This article is for general product-research purposes only and is not medical advice. When your baby is ready for solids, and any feeding concerns specific to your child, are questions for your pediatrician.
Last updated: September 24, 2026
This starting solids checklist is shorter than the shopping lists you’ve probably been handed, and that’s on purpose. The first bites need a safe seat, a soft spoon, and something to catch the mess; a lot of the rest can wait until you see how your baby actually eats. The one thing that’s hardest to fix after you’ve bought it isn’t a gadget at all — it’s a detail on the high chair itself, and it’s covered in section 1.
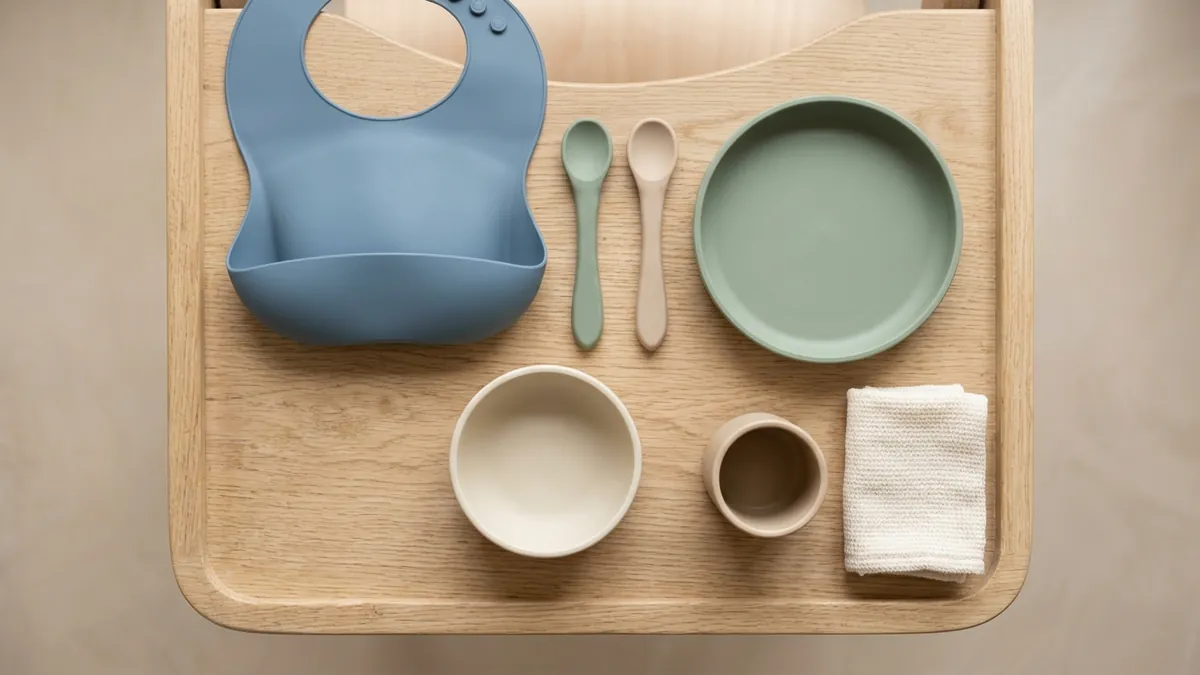
Short answer: For starting solids, you need four things before the first bite: a high chair with a working three- or five-point harness, a bib that catches food, a soft-tipped baby spoon, and washcloths for cleanup. A splat mat, suction plate, cup, and freezer trays come next. Food makers, snack cups, and travel seats can wait.
| Item | What it actually does | When you need it | Grade |
|---|---|---|---|
| 1. High chair with a three- or five-point harness | Keeps baby upright and secured for every meal | Before the first bite | A |
| 2. Food-catching bib | Keeps purées and dropped pieces off clothes | Before the first bite | A |
| 3. Soft-tipped baby spoons | Small, gentle spoon sized for tiny first portions | Before the first bite | A |
| 4. Washcloths or reusable wipes | Faces, hands, tray, and chair straps | Before the first bite | A |
| 5. Splat mat or floor cover | Protects rugs and shortens floor cleanup | First few weeks | B |
| 6. Suction plate or bowl | Keeps the dish on the tray once baby starts grabbing | First few weeks | B |
| 7. Open cup or straw cup | Small sips of water, if your pediatrician okays it | First few weeks | B |
| 8. Freezer trays with lids | Portions and freezes homemade purées | First few weeks (purée route) | B |
| 9. Blender or food processor | Smooths textures; skip if you already own one | Only if your kitchen has nothing | C |
| 10. Baby food maker | Steams and blends in one countertop unit | Optional convenience | C |
| 11. Snack cups | Carries finger foods outside the house | Once finger foods are routine | C |
| 12. Travel booster or hook-on seat | Meals at restaurants or other homes | Later, if you eat out often | C |
Table of Contents
What Do You Need for Starting Solids? The Starting Solids Checklist at a Glance
Before any gear, there’s a readiness question, and this page isn’t going to answer it. When your baby is ready is a question for your pediatrician — not a birthday, not a number on a growth chart, and not a product checklist. What this page can do is make sure the gear is sorted by the time your pediatrician gives the go-ahead, so the first meal isn’t also the day you assemble a high chair.
That order matters for shopping. A starting solids checklist built around a date tends to get bought all at once, a few weeks early, in a burst of registry energy. A starting solids checklist built around readiness gets bought in layers — the seat and spoon first, the rest once you’ve watched a few meals happen. Which is roughly how this page is organized.
For this checklist, we built the gear side from the Consumer Product Safety Commission’s announcements of the federal high chair standard and its recall database, then graded each item by how it’s used in a typical kitchen. Feeding questions themselves — what, when, and how much — are left to your pediatrician, and where our sources stay silent, we say so instead of filling the gap with a guess.
The grades in the starting solids checklist matrix above work like this. Grade A means the item earns its place before the first spoonful. Grade B means it becomes useful within the first few weeks, once you know whether your baby leans toward purées, finger foods, or a mix. Grade C means optional — nice for some households, dead weight for others. Everything on this list can be moved up or down a grade depending on your floors, your kitchen, and how often you eat away from home. The last section shows how that shifts.
1. Seating: The High Chair Comes Before the First Spoon
If you only buy one item from this starting solids checklist ahead of time, make it the seat. Every meal happens in it, so an upright, stable, properly strapped seat is part of the safety setup, not a furniture choice.
Here’s the detail from the intro. In the United States, high chairs are covered by a federal safety standard. When the CPSC approved that standard in 2018, it described requirements for a passive crotch restraint and a three-point restraint system, along with rearward stability and warning labels. The CPSC’s 2019 notice that the standard had taken effect summarizes reported incidents into three recurring patterns: falls when a child climbs in or out, tip-overs when a child pushes back or rocks in the seat, and failures of a component like the restraint, tray, or lock.
That’s why the harness is the part you can’t really improvise later. A chair with a loose tray and no working straps is just a tall seat. CPSC’s guidance is to use the safety straps at every meal, adjust them to fit snugly, and not rely on the tray to hold a child in. The tray is not a restraint, even when it looks like one.
| What to check | Why it matters | How to check it |
|---|---|---|
| Three- or five-point harness plus a passive crotch restraint | The federal standard requires a three-point restraint and a passive crotch restraint; a five-point harness adds shoulder straps on top of that | Look for both in the product photos and manual; test that buckles latch and release |
| Stable, wide base | Tip-overs from pushing back or rocking are a reported incident pattern | Push gently on the backrest when it’s empty; it shouldn’t rock |
| Tray and locks that click fully into place | Component failures, including trays and locks, show up in incident reports | Lock and unlock the tray several times in the store or on arrival |
| Recall status | Secondhand and discontinued models can carry open recalls | Search the brand and model on CPSC’s recall list |
| Cleanable seat and straps | Food gets into seams and webbing quickly | Check whether the seat cover and straps are removable or wipe-clean per the listing |
A secondhand high chair can be a perfectly good choice, with one caveat. The federal standard applies to chairs made or imported after it took effect in 2019, so an older hand-me-down may predate it. That doesn’t automatically make it unsafe, but it’s worth checking the model’s recall history and confirming the restraint system is complete before the first meal. Missing crotch posts and frayed straps are easy to overlook on a chair that otherwise looks clean.
There are exceptions to the “full-size high chair first” rule. A small apartment might have no floor space for a standalone chair, and some families go straight to a booster seat that straps onto a dining chair. That can work, as long as the booster is designed for a baby at this stage and the listing says it meets current CPSC requirements for its product type. The question to ask isn’t “high chair or not,” it’s “does this seat keep my baby upright, strapped in, and stable?” If the answer is yes, it belongs in the Grade A slot. We compared the two head-to-head in our high chair vs booster seat guide. If floor space is the real limit, our best high chair for small spaces roundup compares folding and slim picks.
And then there’s the footrest debate, the tray-width debate, the which-color-hides-stains debate — all of it matters less than whether the harness works. Get that part right, and the hardest item on the starting solids checklist is done. The rest is preference.
2. Catching the Mess: Bibs, Floor Cover, and Cleanup
In the early days, a lot of each feeding tends to end up on your baby’s face, hands, and bib. That isn’t a sign something’s wrong. It’s the job. Which means the second layer of the starting solids checklist is about containing the job, not preventing it.
Bibs are the obvious first line, but the type matters more than the number. A soft bandana-style bib is built to absorb drool; a silicone bib with a molded pocket is built to catch food and wipe clean. We broke that split down in detail in our silicone bib vs bandana bib comparison, and the short version is that they’re doing different jobs at different months. For solids, the pocket bib is the one that earns its Grade A slot. Check the listing for pocket depth and whether the neck closure adjusts, because those two details vary a lot between products.
Washcloths are the unglamorous Grade A item nobody photographs. You’ll use them on faces, fingers, the tray, the straps, and occasionally the wall. Reusable cloths or a stack of plain washcloths usually cover it, though some parents keep disposable wipes on hand for meals away from home. There’s no right answer here, only what you’re willing to launder.
The splat mat sits in Grade B, and it’s the most household-dependent item on this page. Over carpet or a rug, a washable floor cover can save a lot of scrubbing. Over sealed hardwood, tile, or vinyl, a quick wipe after the meal may do the same job, and the mat becomes one more thing to shake out. That’s why the splat mat is the most flexible line on any starting solids checklist. It’s worth waiting a week or two to see how much actually lands on the floor before buying one. Some babies are tidy eaters for a while. Others treat the tray edge like a launch ramp, and then —
Well. Then you buy the mat.
One more cleanup note that tends to get skipped: the chair itself. Food works its way into strap webbing and seat seams faster than you’d expect, which is part of why “cleanable seat and straps” appears in the high chair check above. A chair that’s miserable to clean tends to get cleaned less often, and that’s not a hygiene habit anyone plans for.
3. Feeding Tools: Spoons, Plates, Bowls, and Cups
This is the part of the starting solids checklist where store aisles get crowded, and where the fewest items are strictly necessary on day one. A spoon is. The rest can follow your baby’s lead.
Spoons
First tastes tend to be tiny, so the spoon should be small and soft. Look for a shallow bowl and a soft or coated tip, and check the listing for whether it’s dishwasher-safe and what material it’s made from, since descriptions vary between brands. A couple of spoons is plenty to start; one tends to end up on the floor mid-meal, so a spare within reach is useful.
If your family plans to lean into self-feeding, pre-loadable spoons that a baby can grip become more useful a bit later. They’re not a day-one requirement, though, and the same meal can be a mix of you feeding and baby exploring.
Plates and Bowls
Early purées are easiest from a small bowl you hold, which is why plates and bowls land in Grade B. Once your baby starts reaching and grabbing, a suction base keeps the dish on the tray a little longer — though “a little longer” is the honest ceiling, not a guarantee, and suction strength depends heavily on the tray surface. Suction bases are typically designed for smooth, flat surfaces, so check what the listing says about tray compatibility before assuming it’ll grip yours. If you’re choosing a material, our silicone vs bamboo plates for baby comparison covers cleaning and upkeep.
Whether you start with a plate or a bowl mostly comes down to texture: spoonable foods sit better in a bowl, finger foods spread out better on a divided plate. We compared those two head-to-head in suction plate vs suction bowl, including which one to buy first if you’re only buying one.
Cups
Cups sit in Grade B on this starting solids checklist rather than Grade A. What goes in the cup, and when, is a question for your pediatrician — this page only covers the gear.
That leaves the cup as mostly a practice tool in the first months: small sips, lots of spills, a few surprised faces. An open cup and a straw cup can both work for that. We’re deliberately not going to claim one is better for development here — that’s a question for your pediatrician, not a product page. What we can say is practical: open cups spill more, straw cups have more parts to clean, and some families end up keeping one of each.
4. Prep and Storage: What Your Kitchen Probably Already Covers
Prep gear is where a starting solids checklist can quietly double in price, and where the most items belong in Grade C. The honest reason is that a lot of homes already own the tools. A fork mashes a soft banana or avocado. A regular blender or food processor smooths cooked vegetables. A pot with a steamer basket does the steaming. If your kitchen has those, you may not need anything new at all. When you’re trimming a starting solids checklist to fit a budget, prep gear is the first place to cut.
The route you choose matters here too. Families who go mostly purée will get more use out of blending and freezing gear than families who lean toward baby-led weaning, where soft finger foods come straight off the family’s plate after being cut to the right shape and size. Some households end up doing a bit of each, which is fine.
Freezer trays with lids are the one prep item that earns Grade B for purée households. Making a batch, portioning it, and freezing it saves a lot of weeknight effort. Look for lids that seal and check whether the listing says the tray is freezer-safe and dishwasher-safe, because materials vary. Plain ice cube trays can work in a pinch, though lidless trays can pick up freezer smells.
Baby food makers — countertop units that steam and blend in one bowl — are firmly Grade C. They’re a convenience item, not a requirement. If one appeals to you, one practical check matters for anyone buying from overseas sellers or bringing an appliance from another country: US outlets run at 120V, and a unit designed for 220V markets won’t be a straight swap. Check the listing’s voltage before buying.
The same Grade C logic applies to snack cups. They’re useful once finger foods are routine and you’re feeding on the go. Before that, they mostly sit in a drawer.
5. Safety Setup Before the First Bite
None of the items on this starting solids checklist replace the most important part of the setup: an adult at the table for the whole meal. Everything else here is about making sure the gear does its job before food ever reaches the tray.
| Check | Why it matters | How to check it |
|---|---|---|
| Harness buckled and snug | CPSC advises using the restraints rather than relying on the tray | Buckle and adjust before every meal, not just the first one |
| Tray fully locked | Tray and lock failures appear in CPSC’s incident summaries | Tug the tray after it clicks in |
| Chair on a flat, open spot | Tip-overs when a child pushes back are a reported pattern | Keep the chair away from walls or counters a baby can push against |
| Cleanup kit within reach | Stepping away mid-meal is easier to avoid when everything’s close | Set washcloths and a spare spoon on the table first |
What we can’t tell you is exactly how your baby will take to any of this. Questions about what to serve, how to prepare it, and anything that worries you during a meal belong with your pediatrician — that’s the limit of what a gear checklist can do. Print this starting solids checklist if it helps, but keep the pediatrician’s number next to it.
Starting Solids Checklist Grades by Household: A, B, or C?
The matrix at the top assumes a fairly typical home. Real homes aren’t typical. Here’s how the grades shift across a few common setups — these are our editorial calls based on how each item works, not measured data, so treat them as a starting point for your own list.
| Household | High chair | Splat mat | Suction plate or bowl |
|---|---|---|---|
| Small apartment | A (a strap-on booster seat may replace it) | B | B |
| Carpet or rugs under the table | A | A | B |
| Mostly purées | A | B | B (bowl first) |
| Mostly baby-led weaning | A | A | A (plate first) |
| Twins or two babies eating together | A (two seats) | A | B |
| Eat out or travel often | A | B | B |
| Household | Freezer trays | Baby food maker | Travel seat |
|---|---|---|---|
| Small apartment | B | C (counter space) | C |
| Carpet or rugs under the table | B | C | C |
| Mostly purées | A | C | C |
| Mostly baby-led weaning | C | C | C |
| Twins or two babies eating together | A | C | C |
| Eat out or travel often | B | C | B |
A few patterns stand out. The high chair stays Grade A everywhere, even when it takes the form of a booster seat. The splat mat jumps to Grade A anywhere there’s carpet, and for twins, where two eaters means double the floor fallout. Freezer trays climb for purée-heavy homes and drop for baby-led weaning. And the baby food maker doesn’t move out of Grade C in any of these scenarios, which tells you something about how optional it is.
The twins row deserves one extra note. Two babies starting solids together usually means two full sets of Grade A gear, not shared items, because both meals happen at the same time. That’s the point where a starting solids checklist stops being a shopping list and becomes a logistics plan — two seats, two bibs in rotation, two spoons each, and a cleanup routine that doesn’t depend on one adult having three hands. If you’re choosing those two seats now, our best high chair for twins roundup compares picks by side-by-side width and one-hand trays.
If you’re using this starting solids checklist to plan a registry, a practical approach is to register for the Grade A items, add one or two Grade B items that fit your floors and feeding route, and leave Grade C off entirely. It’s easy to buy a snack cup later. It’s harder to return a food maker that’s still sealed in its box.
Want to go deeper on a specific item? These related guides cover the pieces of this starting solids checklist in more detail:
High Chair vs Booster Seat: Which One Fits Your Space, Budget, and Timeline?
Best High Chair for Small Spaces: 5 Slim and Folding Picks Compared
Best High Chair for Twins: 5 Picks That Fit Two Side by Side
When to Start Solid Foods: Breastfed vs Formula-Fed Timeline
Suction Plate vs Suction Bowl: Which to Buy First
Silicone vs Bamboo Plates for Baby: Which Is Easier to Live With?
Suction Plate for High Chair: Will It Stick to Your Tray?
Silicone Bib vs Bandana Bib: Which Stage Each One Fits
Researched: This starting solids checklist was built from the CPSC’s announcements of the federal high chair standard and its recall database, plus how each item is used in a typical kitchen. We did not test products hands-on for this article. Grades are editorial judgments, not measurements, and no medical claims are made — feeding readiness and anything about what or how to feed belong with your pediatrician.
This post may contain affiliate links. If you purchase through one of these links, we may earn a small commission at no extra cost to you.
Written by The 4 Kids Dad, parent of 4 kids including newborn twins.
Leave a Reply